This guide will help you sync data from your QuickBooks account. If you are coming from the guide on 3 Steps to do Carbon Footprinting for Free, please go to Step 4 directly.
Step 1: Go through Sign up Process
Simply click on this link or click on Get this App on QuickBooks App store to begin the registration process. Add your QuickBooks email, Company Name, Industry code and Password in the first page.
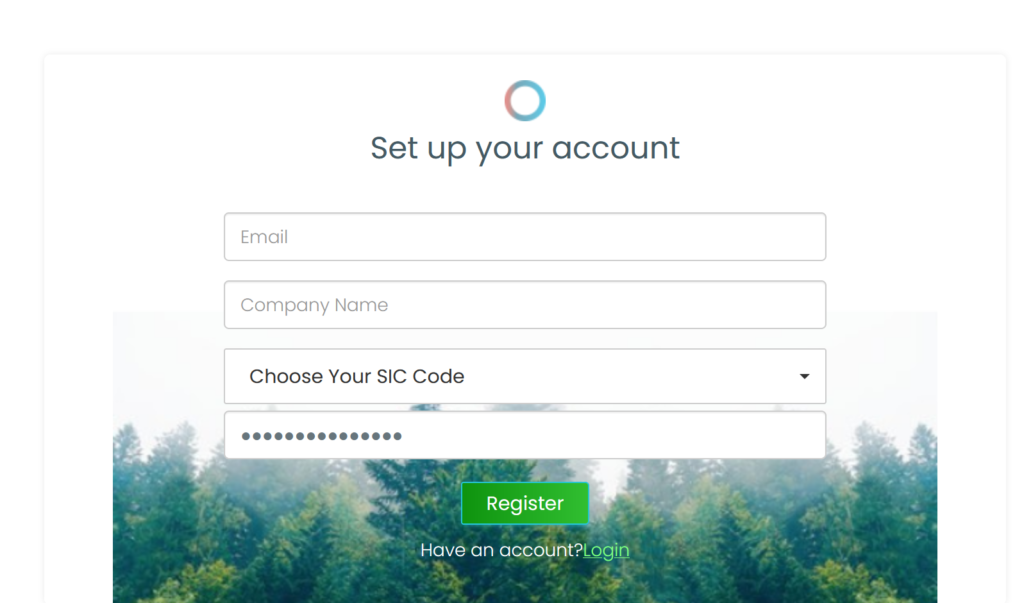
You will then be sent an introduction email. You may access your sign in page and connect with the portal using the email and password.
Step 2: Access our Portal
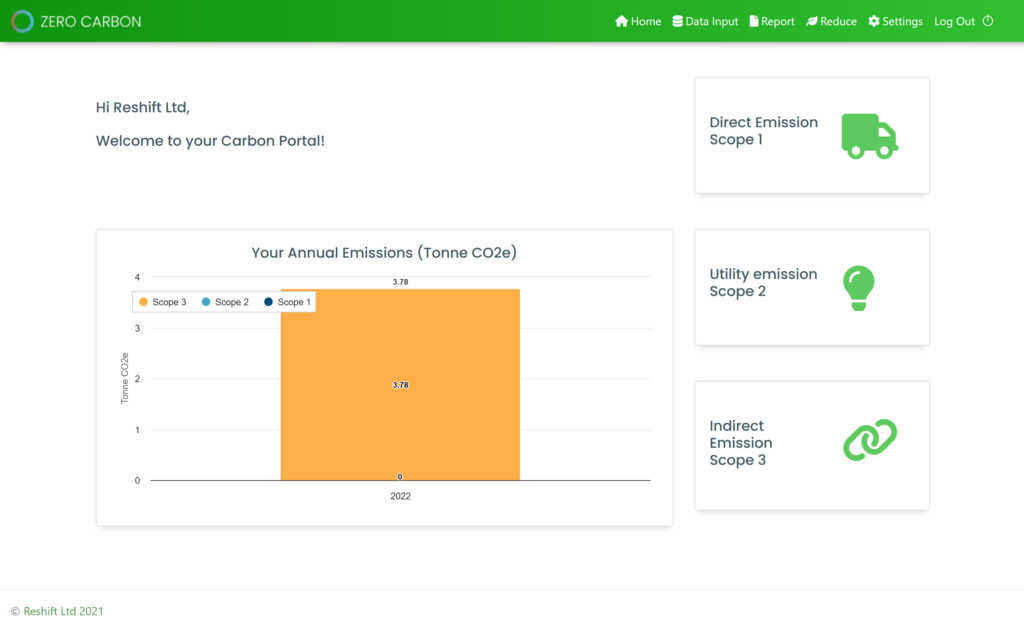
Your home page looks like this. We will explain more about what’s here in a moment. Lets move on to Step 3.
Step 3: Go to Accounting Sync
Click on Data input in the top bar to go to the Emission Data page where you can see all the listed categories that we will come back to later.
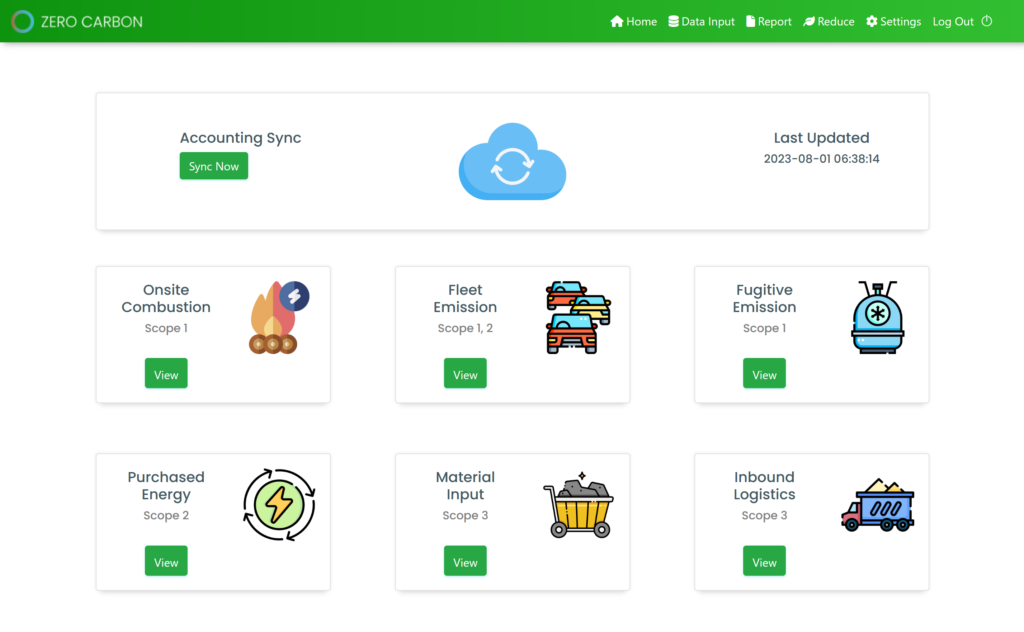
Once you are in the Data Input page, click on Sync now inside the Accounting Sync container that also shows the last time you updated your data.
Step 4: Choose your method of data sync
You may currently use automated sync from QuickBooks or upload your accounting data in an Excel file manually.

Step 5: Sync with QuickBooks
To sync data from QuickBooks effortlessly, please click on Sync with QuickBooks button. You will find a QuickBooks integration page which shows your sync status with QuickBooks and more.

Click on Connect to QuickBooks and you will go to your QuickBooks authentication process.
Step 6: Connect to your QuickBooks account
In this process, you will be requested to connect with the company on your QuickBooks account. Read through the permissions and click on Connect to begin importing data.
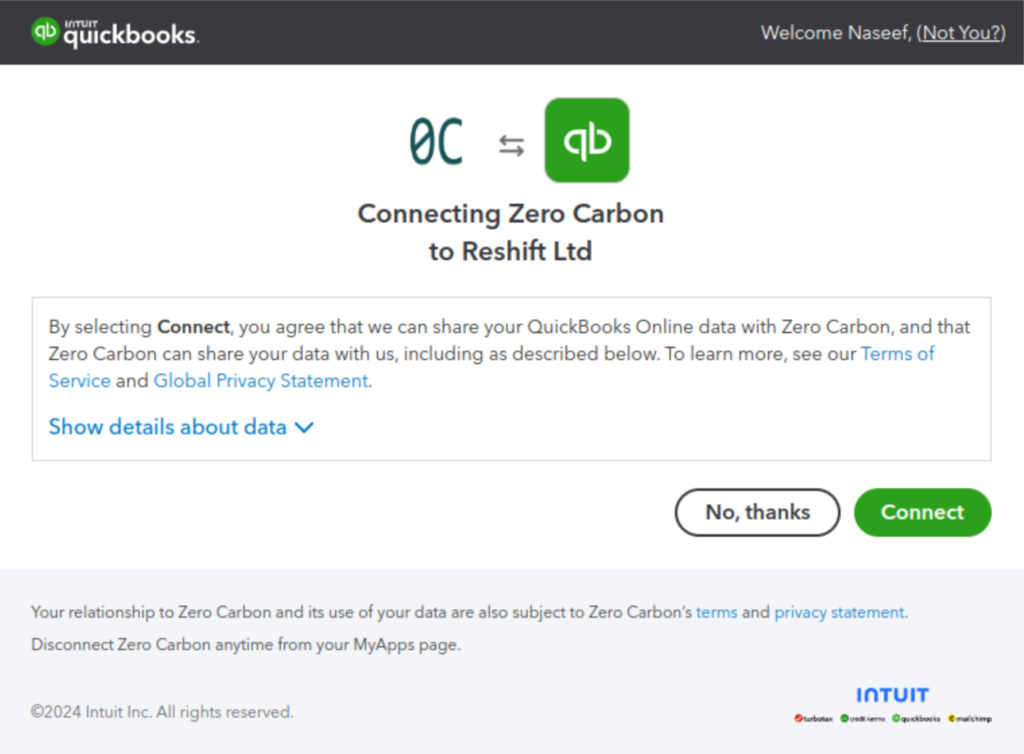
You will now be led back into Zero Carbon application where you will begin working with data. Click on the button below for the guide on importing data into Zero Carbon.



0 Comments